Tuesday, May 29, 2012

Mini Album for Deirdre

Here are some photos of the mini-album I made recently as part of an online one to one swap (Scrapzville swap).  The Theme was Summer and when I contacted Deirdre she mentioned that she was going to a wedding in Spain during the summer and might use the album for some wedding photos.  So I made a summery album that would be sightly "Weddingy".


Front Cover:
 Inside front cover showing pocket with tags
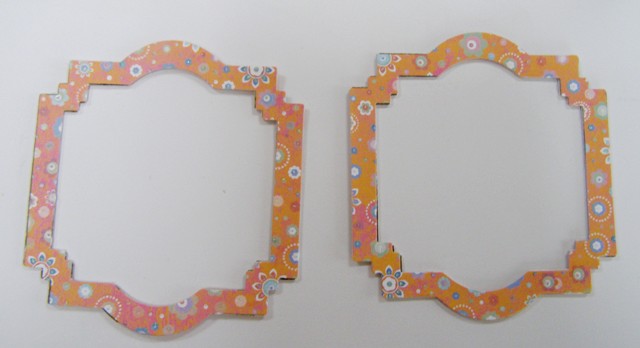
 Mats for photos
 Butterflies and gingham tag
 Each page had a pocket at the top and again at the side with tags inside
 More mats...

 A touch of cool green
My ice cream cone snippets
 Close up of spine with beaded tassel - my first time making a tassel from scratch.

Embellishments that arent my own makes are Kaisercraft "Tigerlily".  The papers I used are from a Papermania 12 x 12 collection that are about 2 years old.
Entering this in
Oldie but a Goldie "anything goes"  (the papers used are about 2 years old.
Thanks for looking
Ger x

Tuesday, May 22, 2012

Recent cards

Cards I've made recently but never got around to blogging:
 Popcorn the bear stamp with ribbon, charm and lots of stickles.
 Card made using the 3 images on the Hero Arts Enchante set, backed with Glassine paper and Kraft card.
 Card made with Pink Paislee papers that came free with a magazine, bird die cut (embossed) sent to me by Aideen, one of my own embroidered butterflies and Kraft card.
Card made using more Tim Holtz sewing room die cuts scrounged from Aideen.  This was made for an online challenge.  It had to have a mask (the silver/black background) use the colours red/black/white with cord and eyelets.  Spotty netting is from Websters pages. 
All the photos look a bit washed out.  Wonder why?  Maybe the good weather is affecting my brain!
Thanks for looking.
Geraldine

Tuesday, May 15, 2012

By the Cute and Girly mid May reminder

Hi everyone!
May is flying by and its time to remind you of this months challenge at By the Cute and Girly.  If you haven't entered yet there is plenty of time - another 2 weeks to be exact.
This months theme is "Spring is in the Air" and all your crafty spring makes are welcome.  Details and inspiration here 
The prizes from our lovely sponsors:


$20 Gift certificate from Simon Says Stamp


£10 Gift Certificate from Joanna Sheen

For my mid-month make I have created some tags using the Go Kreate concentric die No 3 and Doodlebug trims for all three.


First tag was made with Pink Paislee Spring Jubilee paper (came free with a magazine) a Marianne flower die and a flower made with the TH Tattered flowers border.
Middle tag has a stamped embossed background made with TH flutter stamp, birdy motif cut out of the Pink Paislee paper and the Marianne flower chopped up.
Last tag features Prima Nature garden stamp.  I punched holes around the tag, laced some fibres through them and hung glass leaf beads from the fibres.   Hope these have a springy feel about them.
thanks for looking and dont forget to enter!
Entering these Tags in the Cheerful Stamp pads Tags challenge
Geraldine x

Monday, May 7, 2012

Wise Owl Fabric covered Junk Journal

Have been thinking about making one of these for a while..
 So I gathered up lots of upholstery fabric scraps, bits of ribbon and embrodered lacy bits for the cover.  Now apologies if your eyes are insulted by the rough uneven stitching but its meant to be a JUNK journal not a tailored one!
 Inside of front cover showing pocket...
 Inside of back pocket showing section of pockets made from clear plastic copy book covers.
For the pages I used a selection of paper shopping bags, old envelopes, scrapbook papers, the papers that come in the middle of craft mags etc  cut them all down to the same size, folded them in half.  Then I machine stitched each group of 6 pages together down the centre then placed them inside the cover and stitched them on to the spine of the cover.  I made 4 groups of 6 pages folded in half ending up with 48 pages that can be used on both sides.  Plus the clear plastic pages at the back and there is plenty of space for any journaling and storage.

 Centre of group of 6 pages showing 2 rows of stitching...now I could have hand sewed the pages to the spine part of the cover with a bookbinding technique but machining is sooo fast and the pages can be easily torn out and replaced....
Typical pages made from part of an Avoca bag and old electricity bill envelope

This photo shows the fabric back, front and closing flap of journal

Journal closed  with fabric tie
The gold/brown strip of fabric is the wired Christmas ribbon you can get in every chainstore (with the wire removed, of course!)
I love combining papercrafting and sewing in this way and this wont be the last junk journal I make, God and eyesight willing.
Thanks for looking
Ger x

Wednesday, May 2, 2012

Giveaway/Competition Winner....

is ...............

Julie!
Hope you enjoy playing around and creating with them, Julie.
Thank you very, very much to everyone who entered. 
 Please keep an eye on my blog 'cause you never know when a little, non-calorific candy might pop up!
Ger x

Tuesday, May 1, 2012

May "Spring is in the Air" challenge

This months challenge at By the Cute and Girly, chosen by ace crafter Ayelet, is "Spring is in the Air".  Today in Dublin with the rain belting down non-stop it is very hard to think of anything but the wet stuff being in the air....but perhaps a bit of crafting and the lovely prizes from our sponsors might inspire you to create some Spring makes!
Details of challenge HERE.   Remember BTC&G is an all crafts welcome challenge blog, not just for papercrafts..

The prizes from our fabulous sponsors:

$20 Gift certificate from Simon Says Stamp
£10 Gift Certificate from Joanna Sheen

For my Spring make I have created a little bird in a bower ornament from card, paper, glue and a few embellishments.

 Here's how you can make one similiar.

 To make the frames I have secured 2 nesting dies together with masking tape.  I used Spellbinders Labels 22 but any nesting label type dies should be ok.
Cut 2 frames from card and 4 from patterned paper
 Glue paper frames on to either side of card frames and let them dry
 I have stamped my frames in green ink with a small swirly stamp but this is not essential
Decorate the frames (I used a few(!) pearls).  This is best done before assembling the frames
Level off the bottom edge of both frames so that the ornament will stand steady once assembles (just cut it straight across).  This isnt necessary if you intend to hang up the ornament.

 Cut one frame in half vertically
 Get the bird ready.  I have used two small flat wooden birds and glued them together with a length of ribbon stuck in between them for hanging.  You could use a metal bird charm, a die cut bird or even a photo in a frame.  It doesn't even have to be a bird. 
For the blue ornament I sat the bird on a little branch from the garden.  There are all sorts of variations....
 Glue ribbon to top of (uncut) frame.  Make a loop if you want to hang the finished ornament
 Glue the half frames back on to the uncut frame at right angles to it.  I used a hot glue gun for this

Decorate your little ornament.  If you have a hanging loop you will have to punch a hole through and flowers on the top of the ornament to allow the ribbon to come up.
Here's another I made a few weeks ago


Its taller, made with a Go Kreate die set, plain card inked with Distress Inks and a spun cotton bird (you can buy these on Etsy).  The bird is sitting on a swing made from a bit of card and some string. I have added a little yellow crochet doiley at the top.
If you have any questions please leave a comment, and I will try to help. Now don't forget to enter you Spring-y creations in the challenge!
Back later with the results of my giveway/competition...

Ger x


Related Posts Plugin for WordPress, Blogger...